
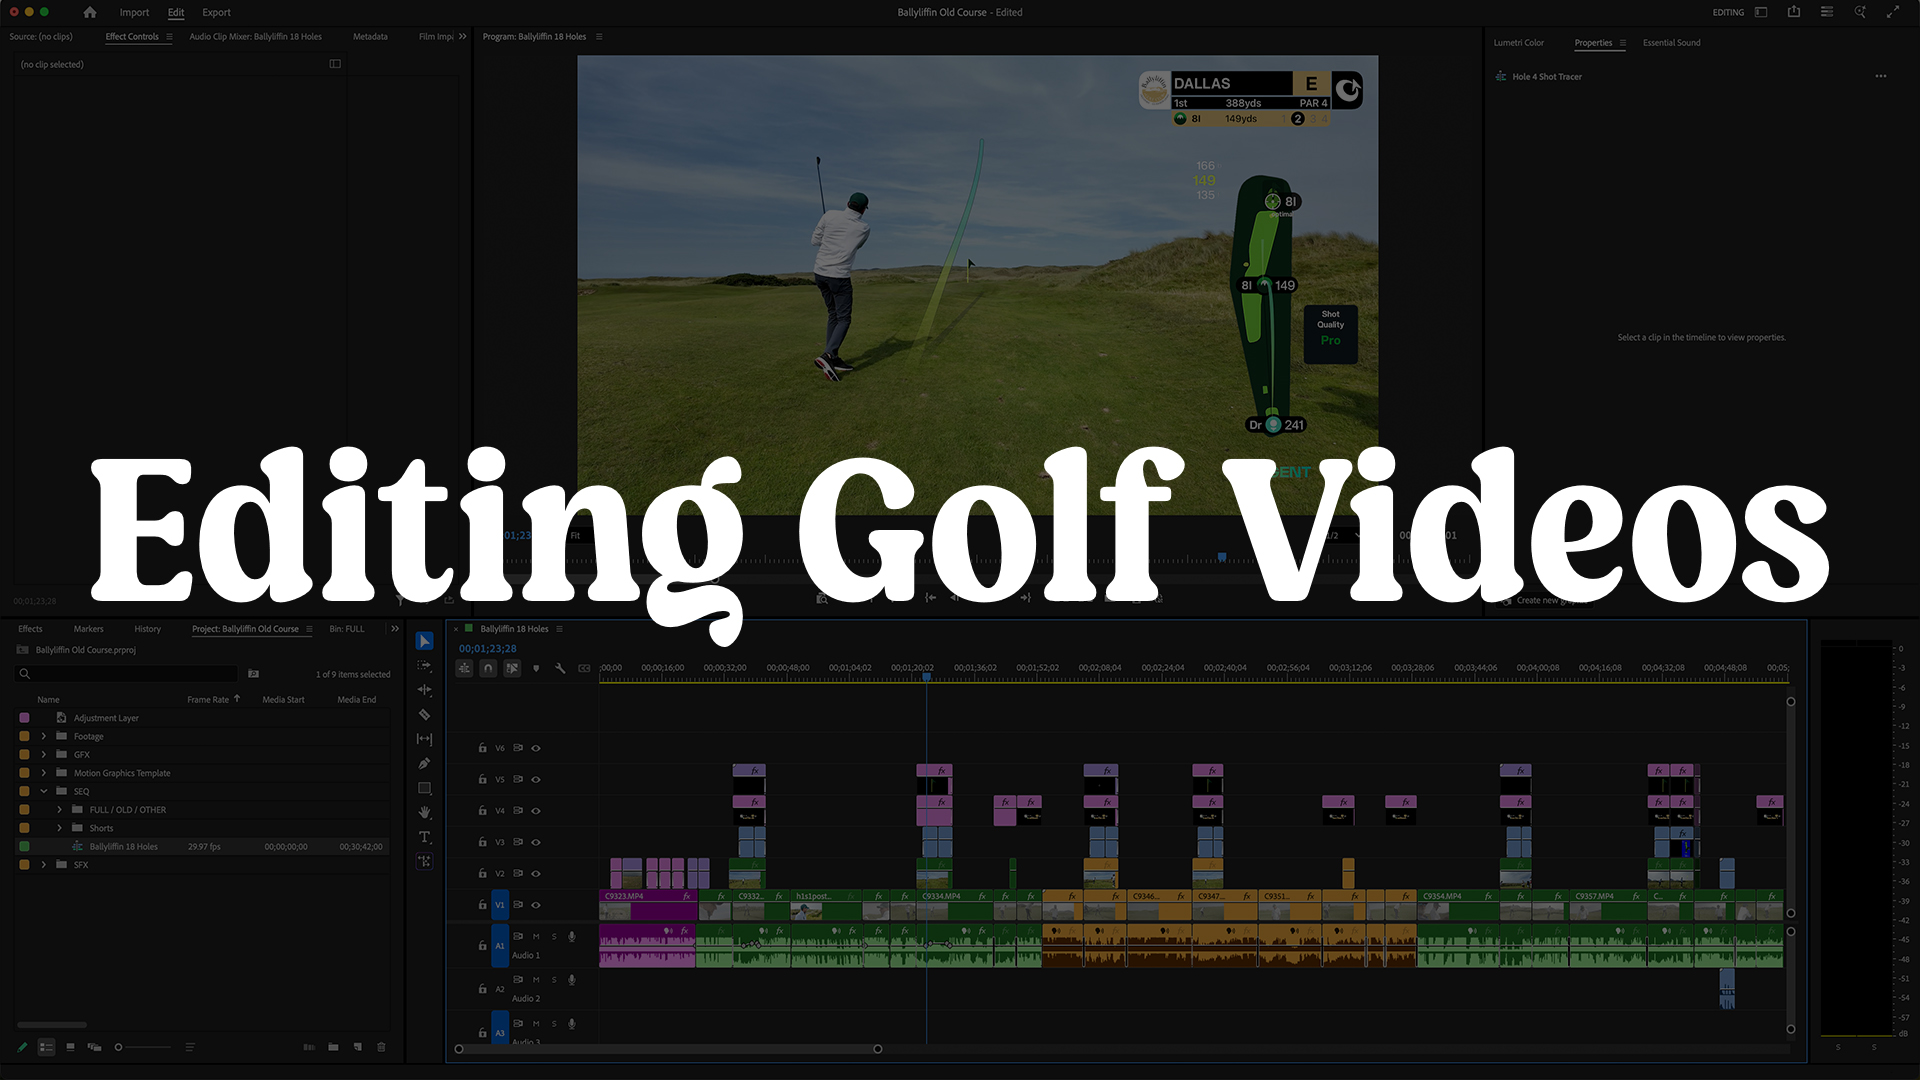
If you’re a golf brand or golf content creator, you’ve probably noticed how quickly YouTube golf and golf content has exploded over the past five years. It’s grown so much that the PGA Tour and other organizations (LIV… cough) have embraced creators and amateur golf content as part of their overall marketing strategy.
As golf content has surged in popularity, brands and creators of all sizes have started producing more golf videos for YouTube and social media. The problem? Editing golf videos is hard. Without a clear, repeatable process, you end up wasting an incredible amount of time and money trying to piece everything together.
At Capture, we’ve been editing golf videos for brands and golf content creators on a monthly recurring basis. Thanks to our streamlined workflow, we’ve edited a ton of golf videos. That process has been refined over years of real-world experience, and in this guide, we’re sharing it all.
By the end of this blog, you’ll know how to edit golf videos faster, cleaner, and more efficiently. Grab a notepad or bookmark this page, there’s a lot to learn. And if you are simply looking to hire a golf video editor and outsource it, book a call with us.
The Different Types of Golf Videos
Before we get into our step-by-step process, it is important to understand the different types of golf videos. In general, all of them follow a similar editing workflow, but depending on how you film, certain steps will change.
1. Self-Filmed Golf Videos (One Camera)
Self-filmed golf videos are typically the easiest to edit. These are usually shot with a single camera, with the golfer setting up a tripod behind each shot. Dialogue may be filmed before or after the round to recap the match, but in many cases a voiceover script is written and recorded after filming to pair with the footage.
2. Videographer-Filmed Golf Videos (Multiple Cameras)
For golf brands or creators with larger budgets, a separate videographer (or multiple) will handle filming. This usually involves one camera behind the golfer and another capturing dialogue, banter, and on-course moments. The story is told as the round unfolds, so a voiceover is often not needed.
These videos are more challenging to edit because you need to sync multiple camera angles and audio sources, and there is significantly more footage to manage.
3. Voiceover Golf Videos
Voiceovers can be used for both self-filmed golf videos and multi-camera golf productions. This format is a great way to tell the story after the fact and allows you to focus on playing and filming the golf itself instead of worrying about dialogue during the round.
There is some overlap between all three types of golf videos, but these are the most common formats you will encounter. In terms of complexity, the more cameras and gear you use, and the more golfers that are playing, the more complex the editing process becomes.
This is important to keep in mind when building a golf video marketing strategy, because more complex does not always mean better. With that said, let’s get into the editing process, which works for all three types of golf videos.
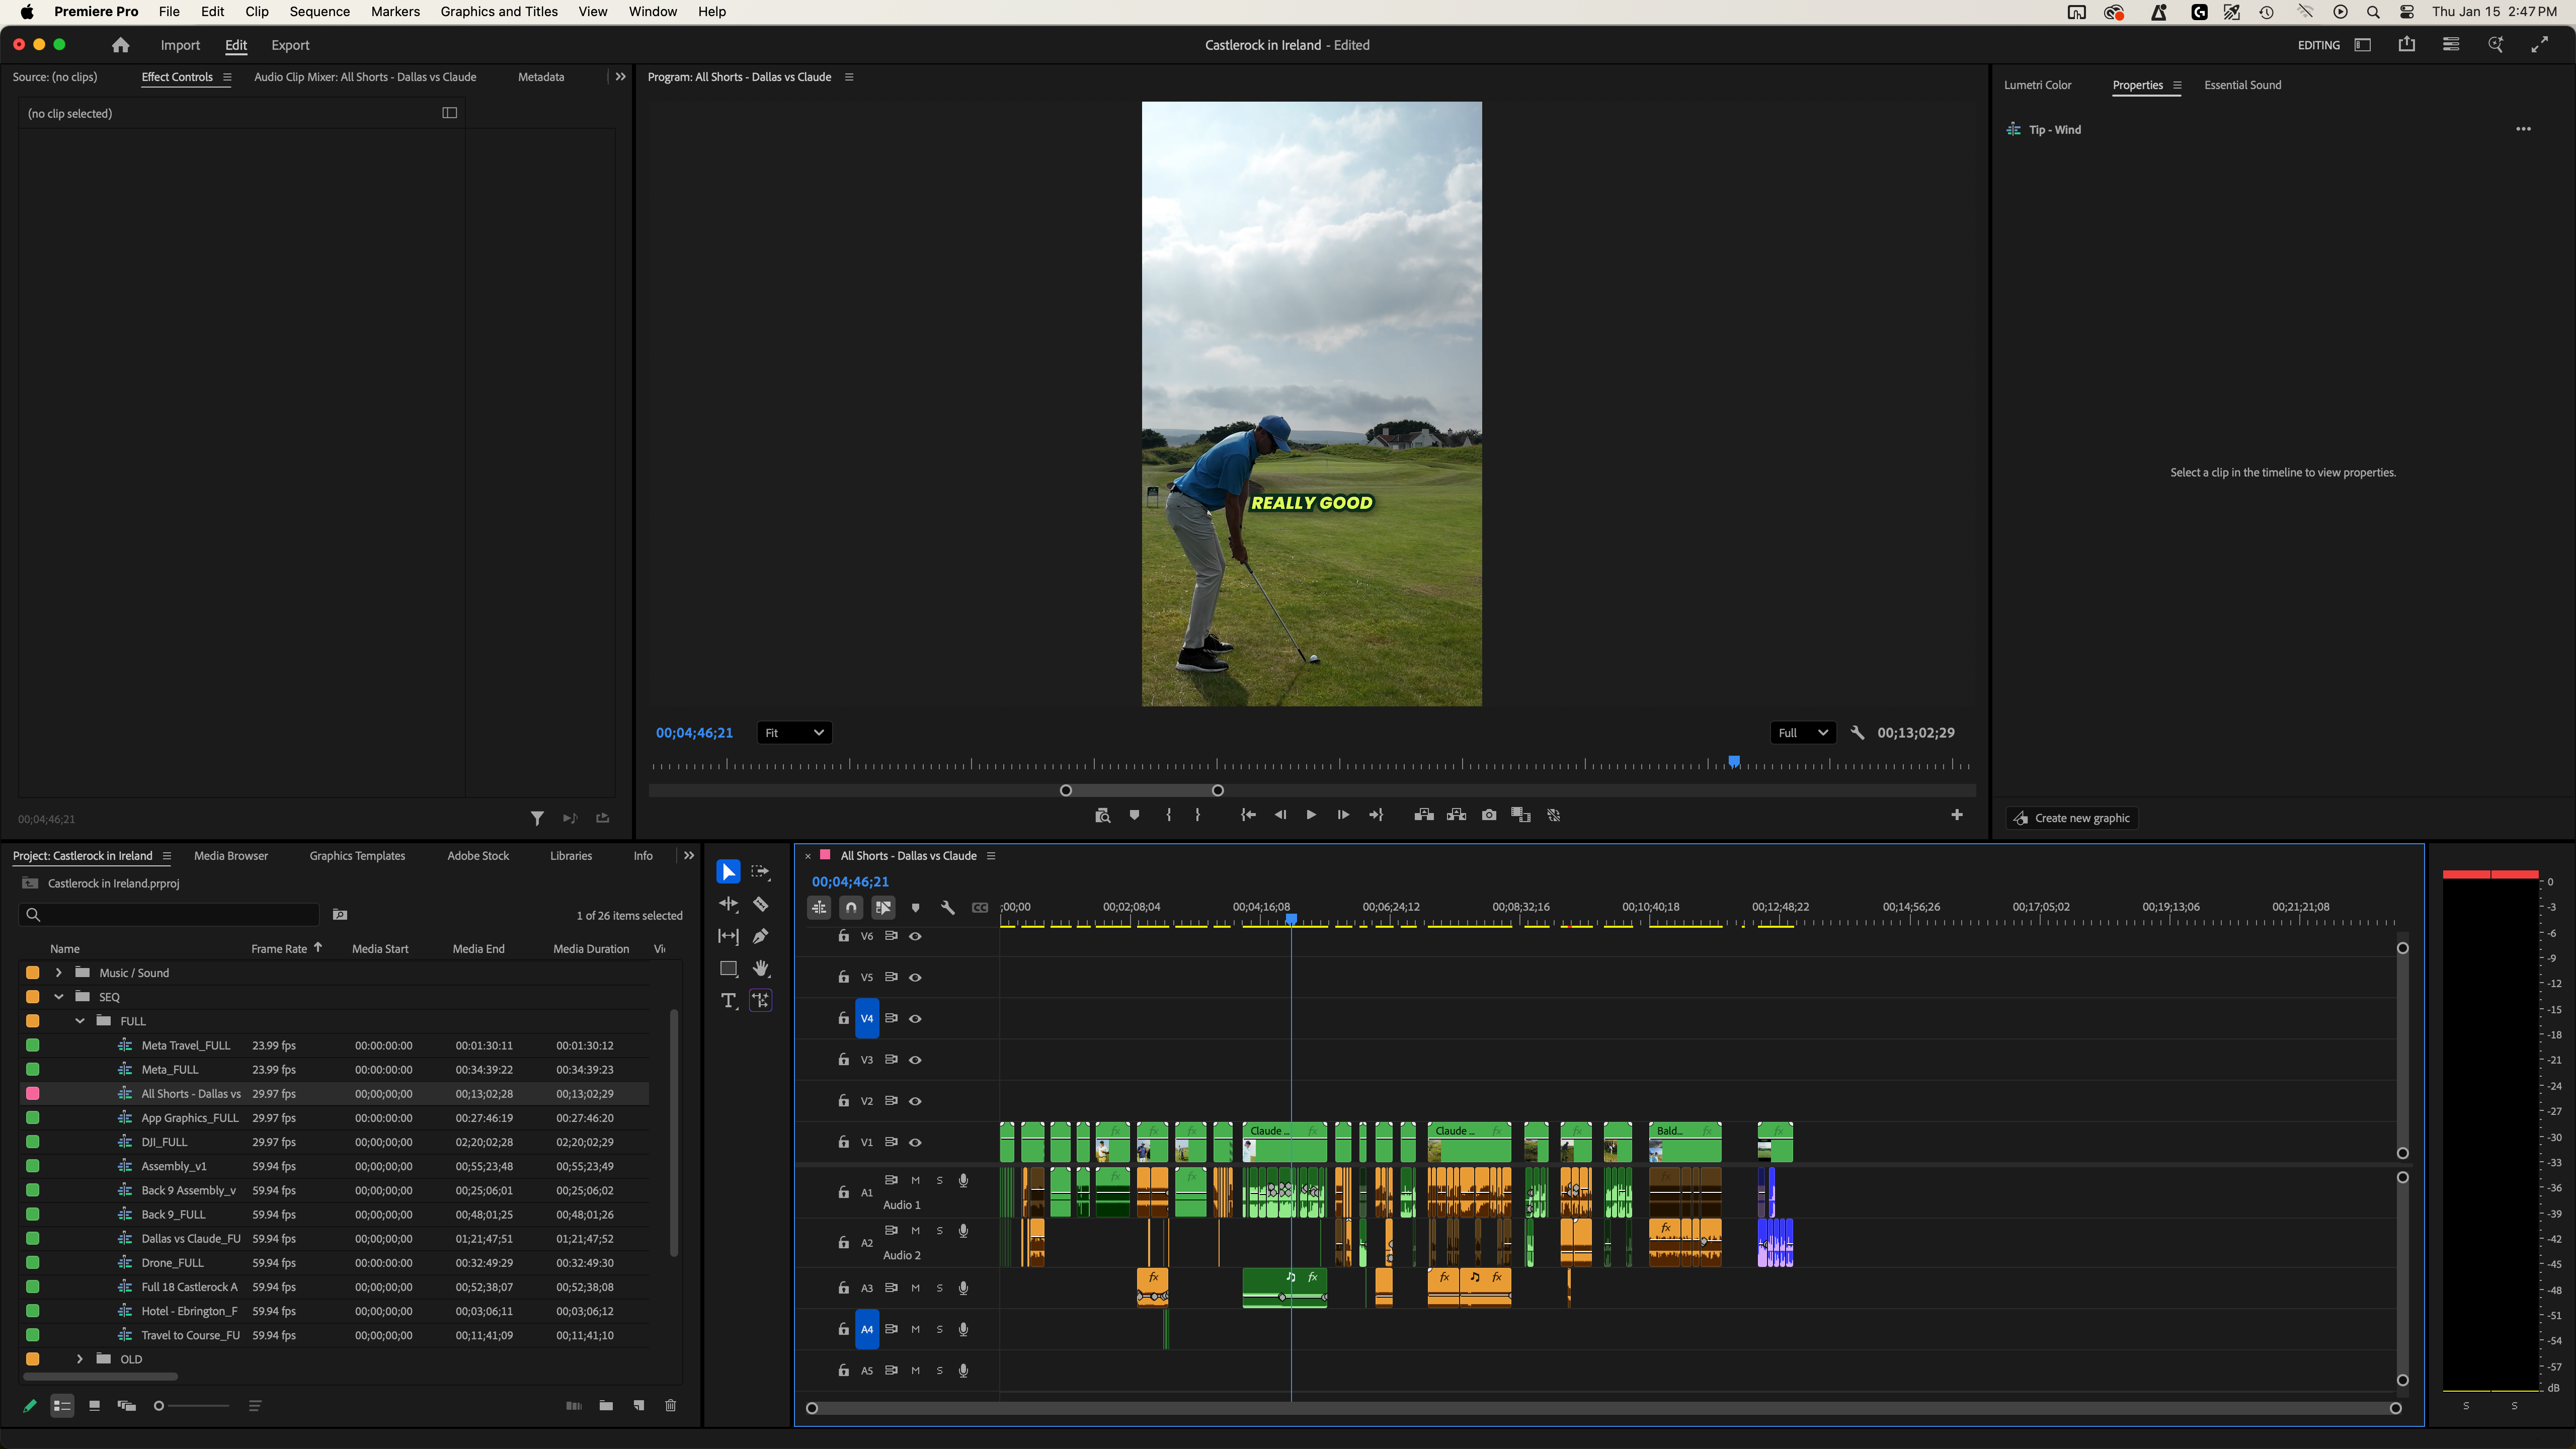
Step 1 - Assembly Edit
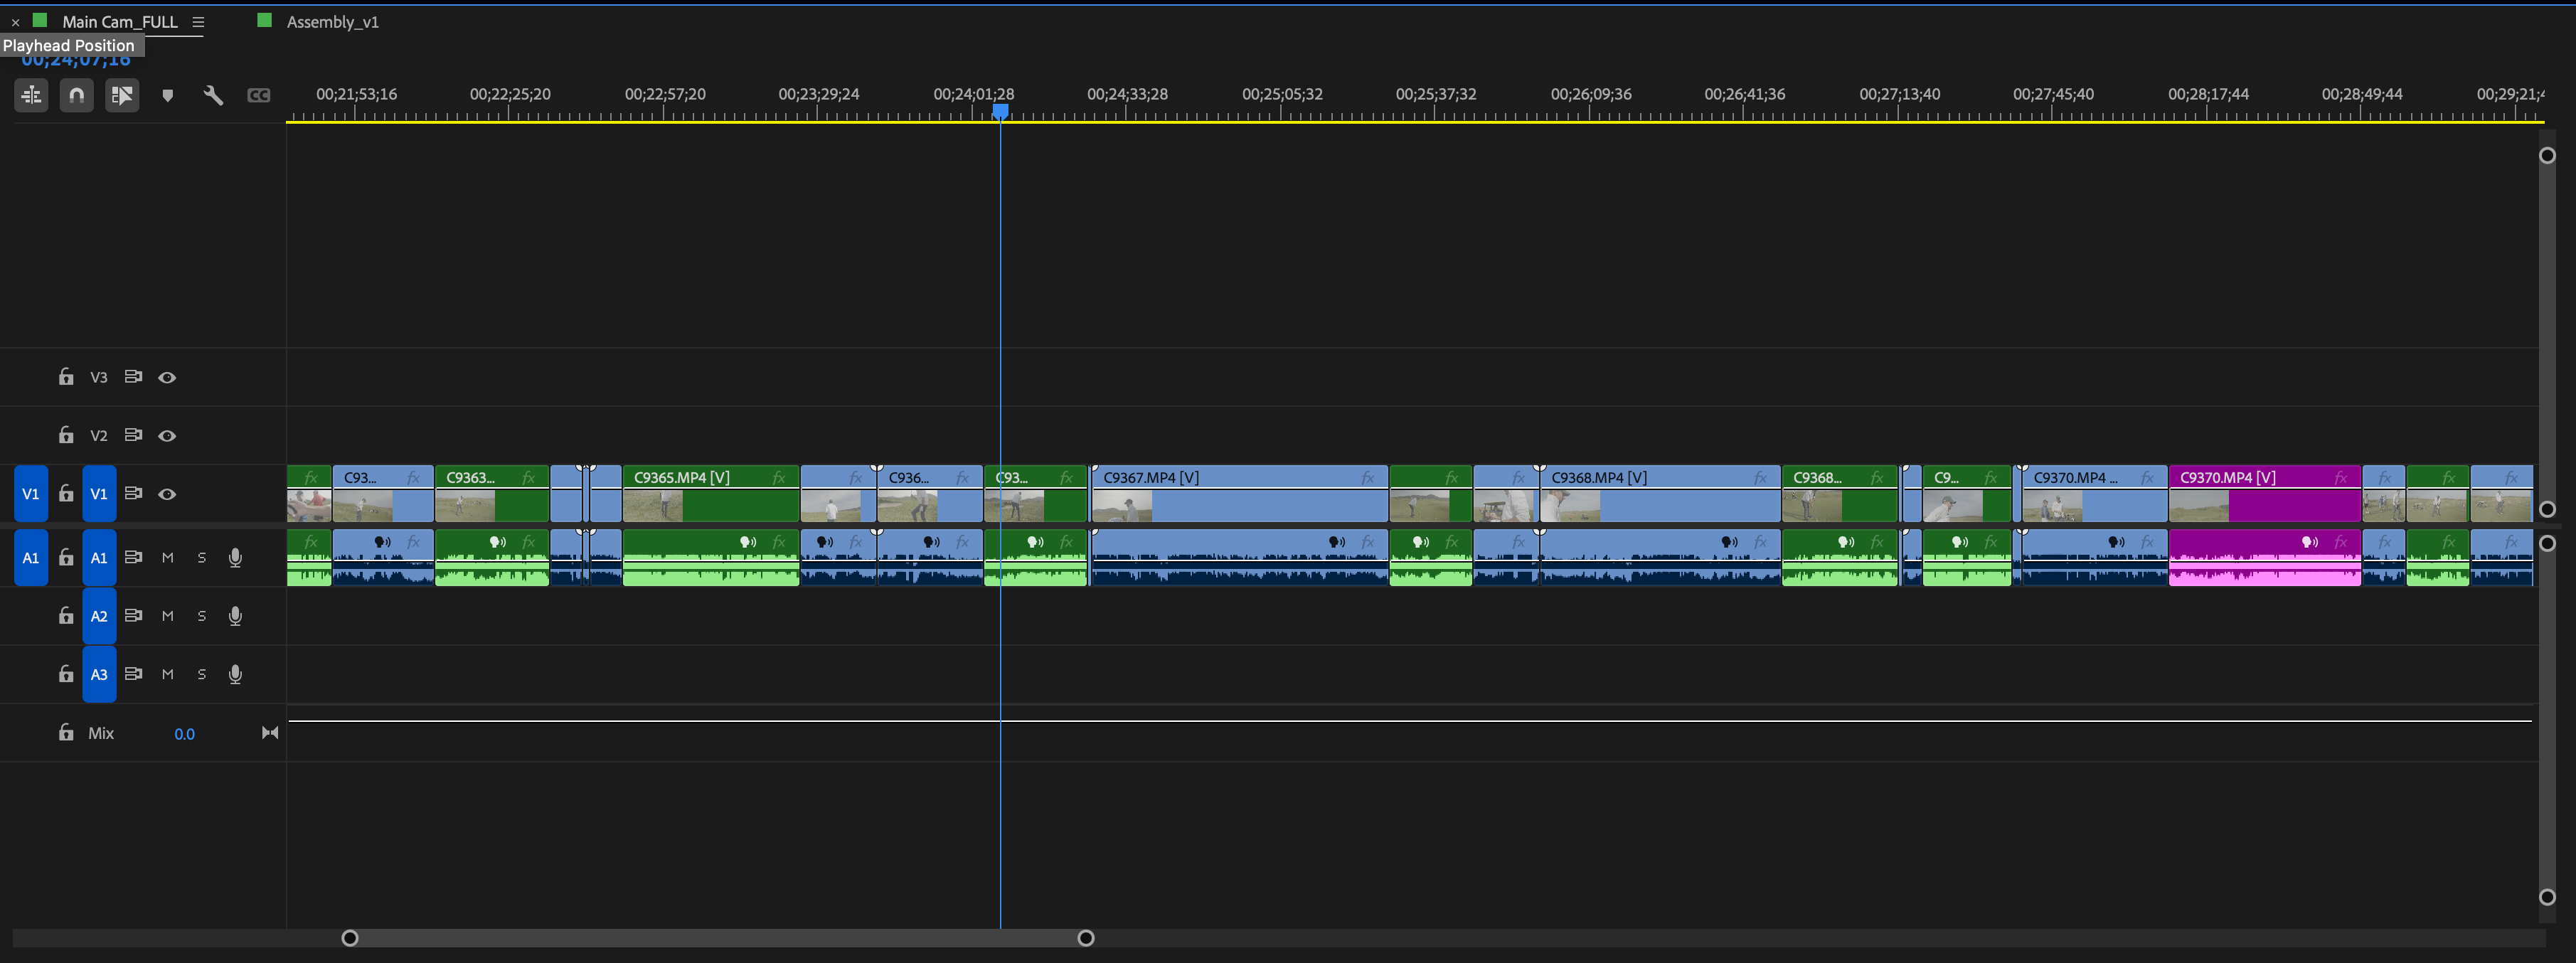
An assembly edit is simply a stringout of all the cameras and footage you have, with synced audio, in chronological order. In our opinion, the assembly edit is the most important part of editing a golf video. It gets you organized and sets the rest of the edit up for success.
Start with the following steps:
- Start by stringing out each camera you have in a separate sequence.
- Watch through each camera at 2x speed, highlighting all shots and key moments. We use colored labels for this.
- Create an assembly sequence and bring in each camera (the highlighted parts) syncing everything hole by hole. Leave space between each hole.
- Keep your shot tracer camera on track 1, your primary or secondary camera on track 2, and any additional cameras, such as drones or cart cams, on track 3.
- Place intro content at the start of the video and recap or outro content at the end.

Some tips for syncing audio:
- If you have a higher budget, using timecode across all cameras and audio sources makes this process extremely fast.
- If you are syncing manually, use hits or clear actions as reference points. Audio waveform peaks work well for this.
- Always feed audio directly into the camera while filming, if possible.
- If you record separate audio without timecode, this creates a lot of extra work. We always recommend feeding audio directly into the camera using a wireless LAV synced to your main camera, or both cameras if possible.
- If you want a simpler setup, a shotgun mic like a VideoMic Pro is often good enough for golf content.
Once your assembly edit is complete, it should look something like this. Each hole is synced, with intro and end content clearly separated and labeled in a different color. We often alternate colors for each hole so you can quickly see when one hole ends and the next begins.
Step 2 - Record Voiceover (Only If Needed)
This step is not required for every golf video, only for videos where there is not enough on-course dialogue.
A great way to write a voiceover script is to watch your assembly edit on mute and use a voice-to-text tool while you talk through the video. Narrate what is happening, your strategy for each hole, what you did right, what you did wrong, and anything else that adds context.
Once you are finished, paste the raw transcription into ChatGPT using the following prompt:
“Below is my raw audio while I talked over a golf video of mine, narrating what was happening. Take this audio and turn it into a script I can re-read that keeps my tone and style from before.”
After you get the revised script back, record your voiceover hole by hole, reading from the script ChatGPT created using your own words. This keeps the narration natural while making it clean and easy to follow.
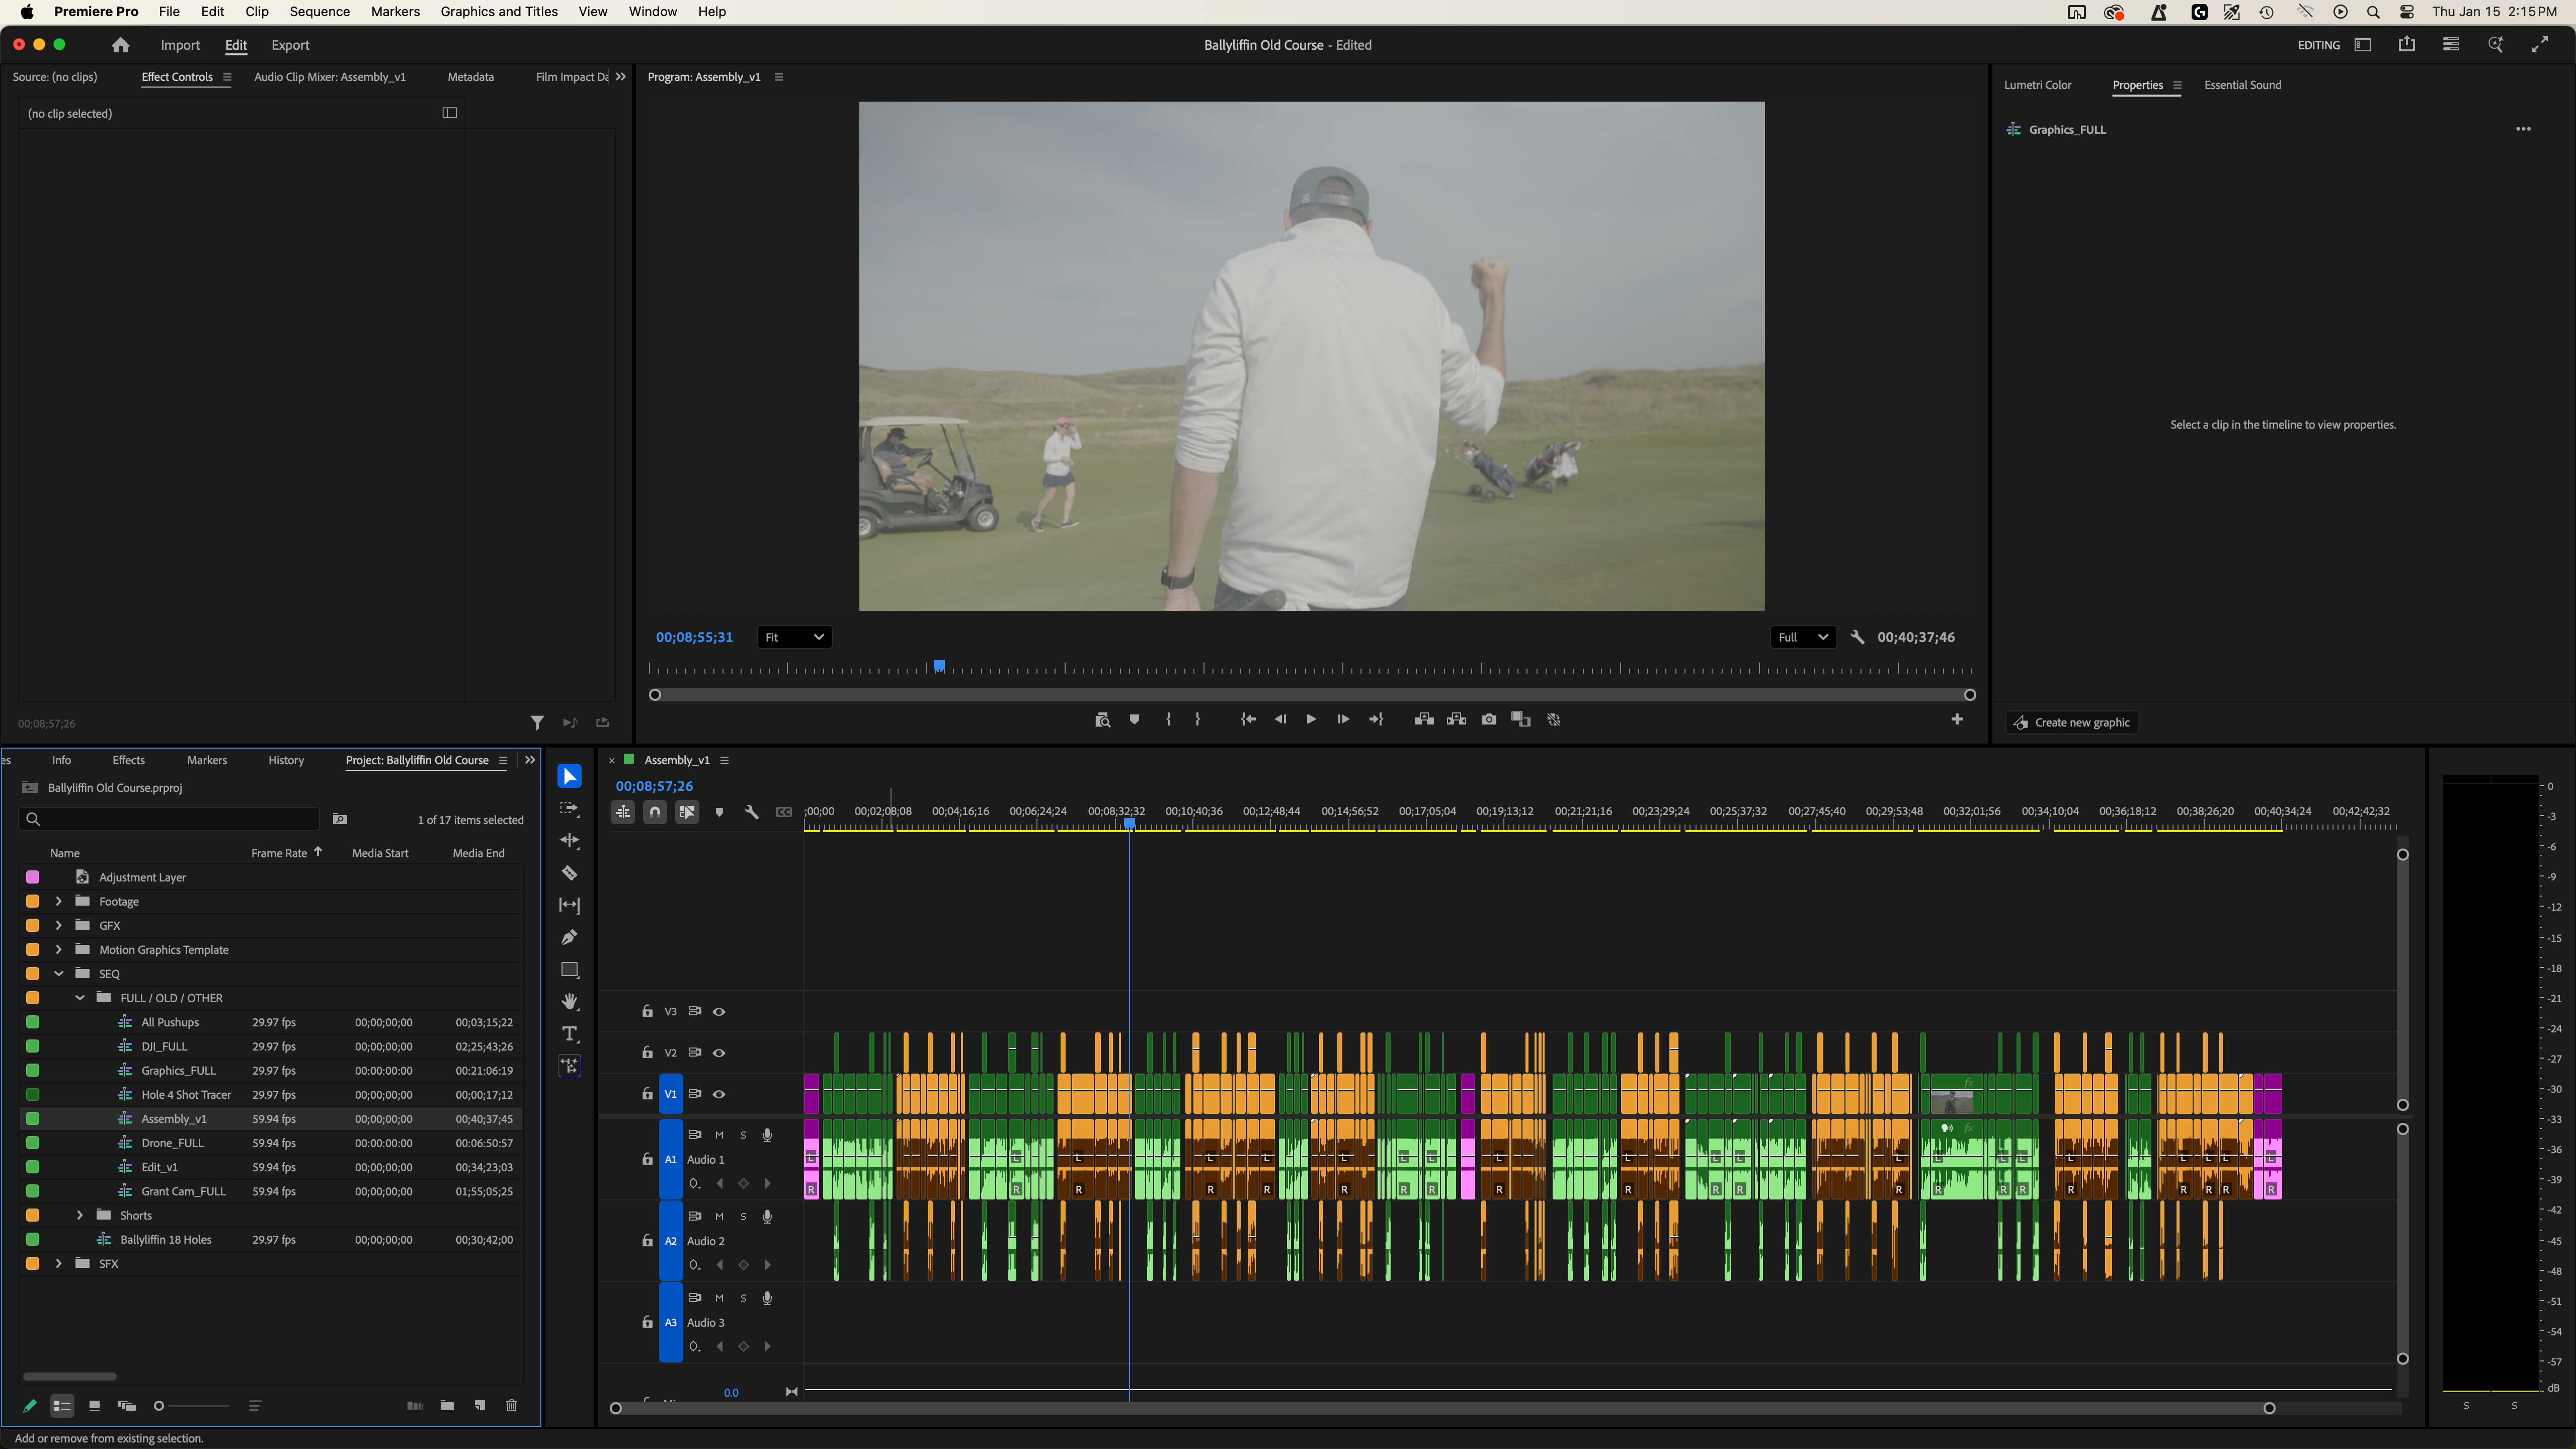
Step 3 - Rough Cut
All right, the hard part is done. You now have an assembly edit with all of your content in order, you’ve recorded a voiceover if you need one, and it is time to clean it up.
There is nothing fancy about this step. You are mostly cutting out dead space and keeping the content moving forward. Aside from the introduction, which you should save for last, golf videos are almost always edited in chronological order. Because of that, there are not a lot of complex edit decisions to make.
The biggest decisions you will make are what to cut. A full round of golf takes four to five hours (if you don't have someone slow in front haha) and a lot of that footage is boring. Nobody is going to watch it.
Here are our tips on what to cut:
- Dead space - Anything where nobody is talking and no golf shots are happening.
- Pre-shot routines - You can keep the occasional one, but this section should be cut down significantly. If you want to show part of a routine, let the audio trail underneath until the golfer hits the shot.
- Reading the green - Unless it is a high-stakes putt or an unusually difficult green, cut most of this. Keep any of the read-related dialogue very short.
- Non-interesting dialogue - This one is subjective. Larger creators with strong personalities can leave more of this in because they already have an audience. If you are relatively unknown, cut anything that is not interesting. Simple.
During the rough cut, you will also want to set up your shot tracers. We recommend nesting each shot that will require a shot tracer, typically drives and approach shots. Chipping usually does not need a shot tracer, but that is up to you. Nesting shots makes it easy to export all tracer clips and replace them later.

If you are using a voiceover, sync it directly with the footage you are talking about. We usually do this hole by hole and leave space in the voiceover for the moment when the shot is being hit. This keeps the pacing natural and lets the golf shots breathe without being talked over.
Once your rough cut is complete, you should have a trimmed timeline with no dead space that flows smoothly from hole to hole. The story is there, but it still needs polish. That includes the introduction, which we will cover next, as well as graphics and shot tracers. The heavy lifting of the edit, however, is done.
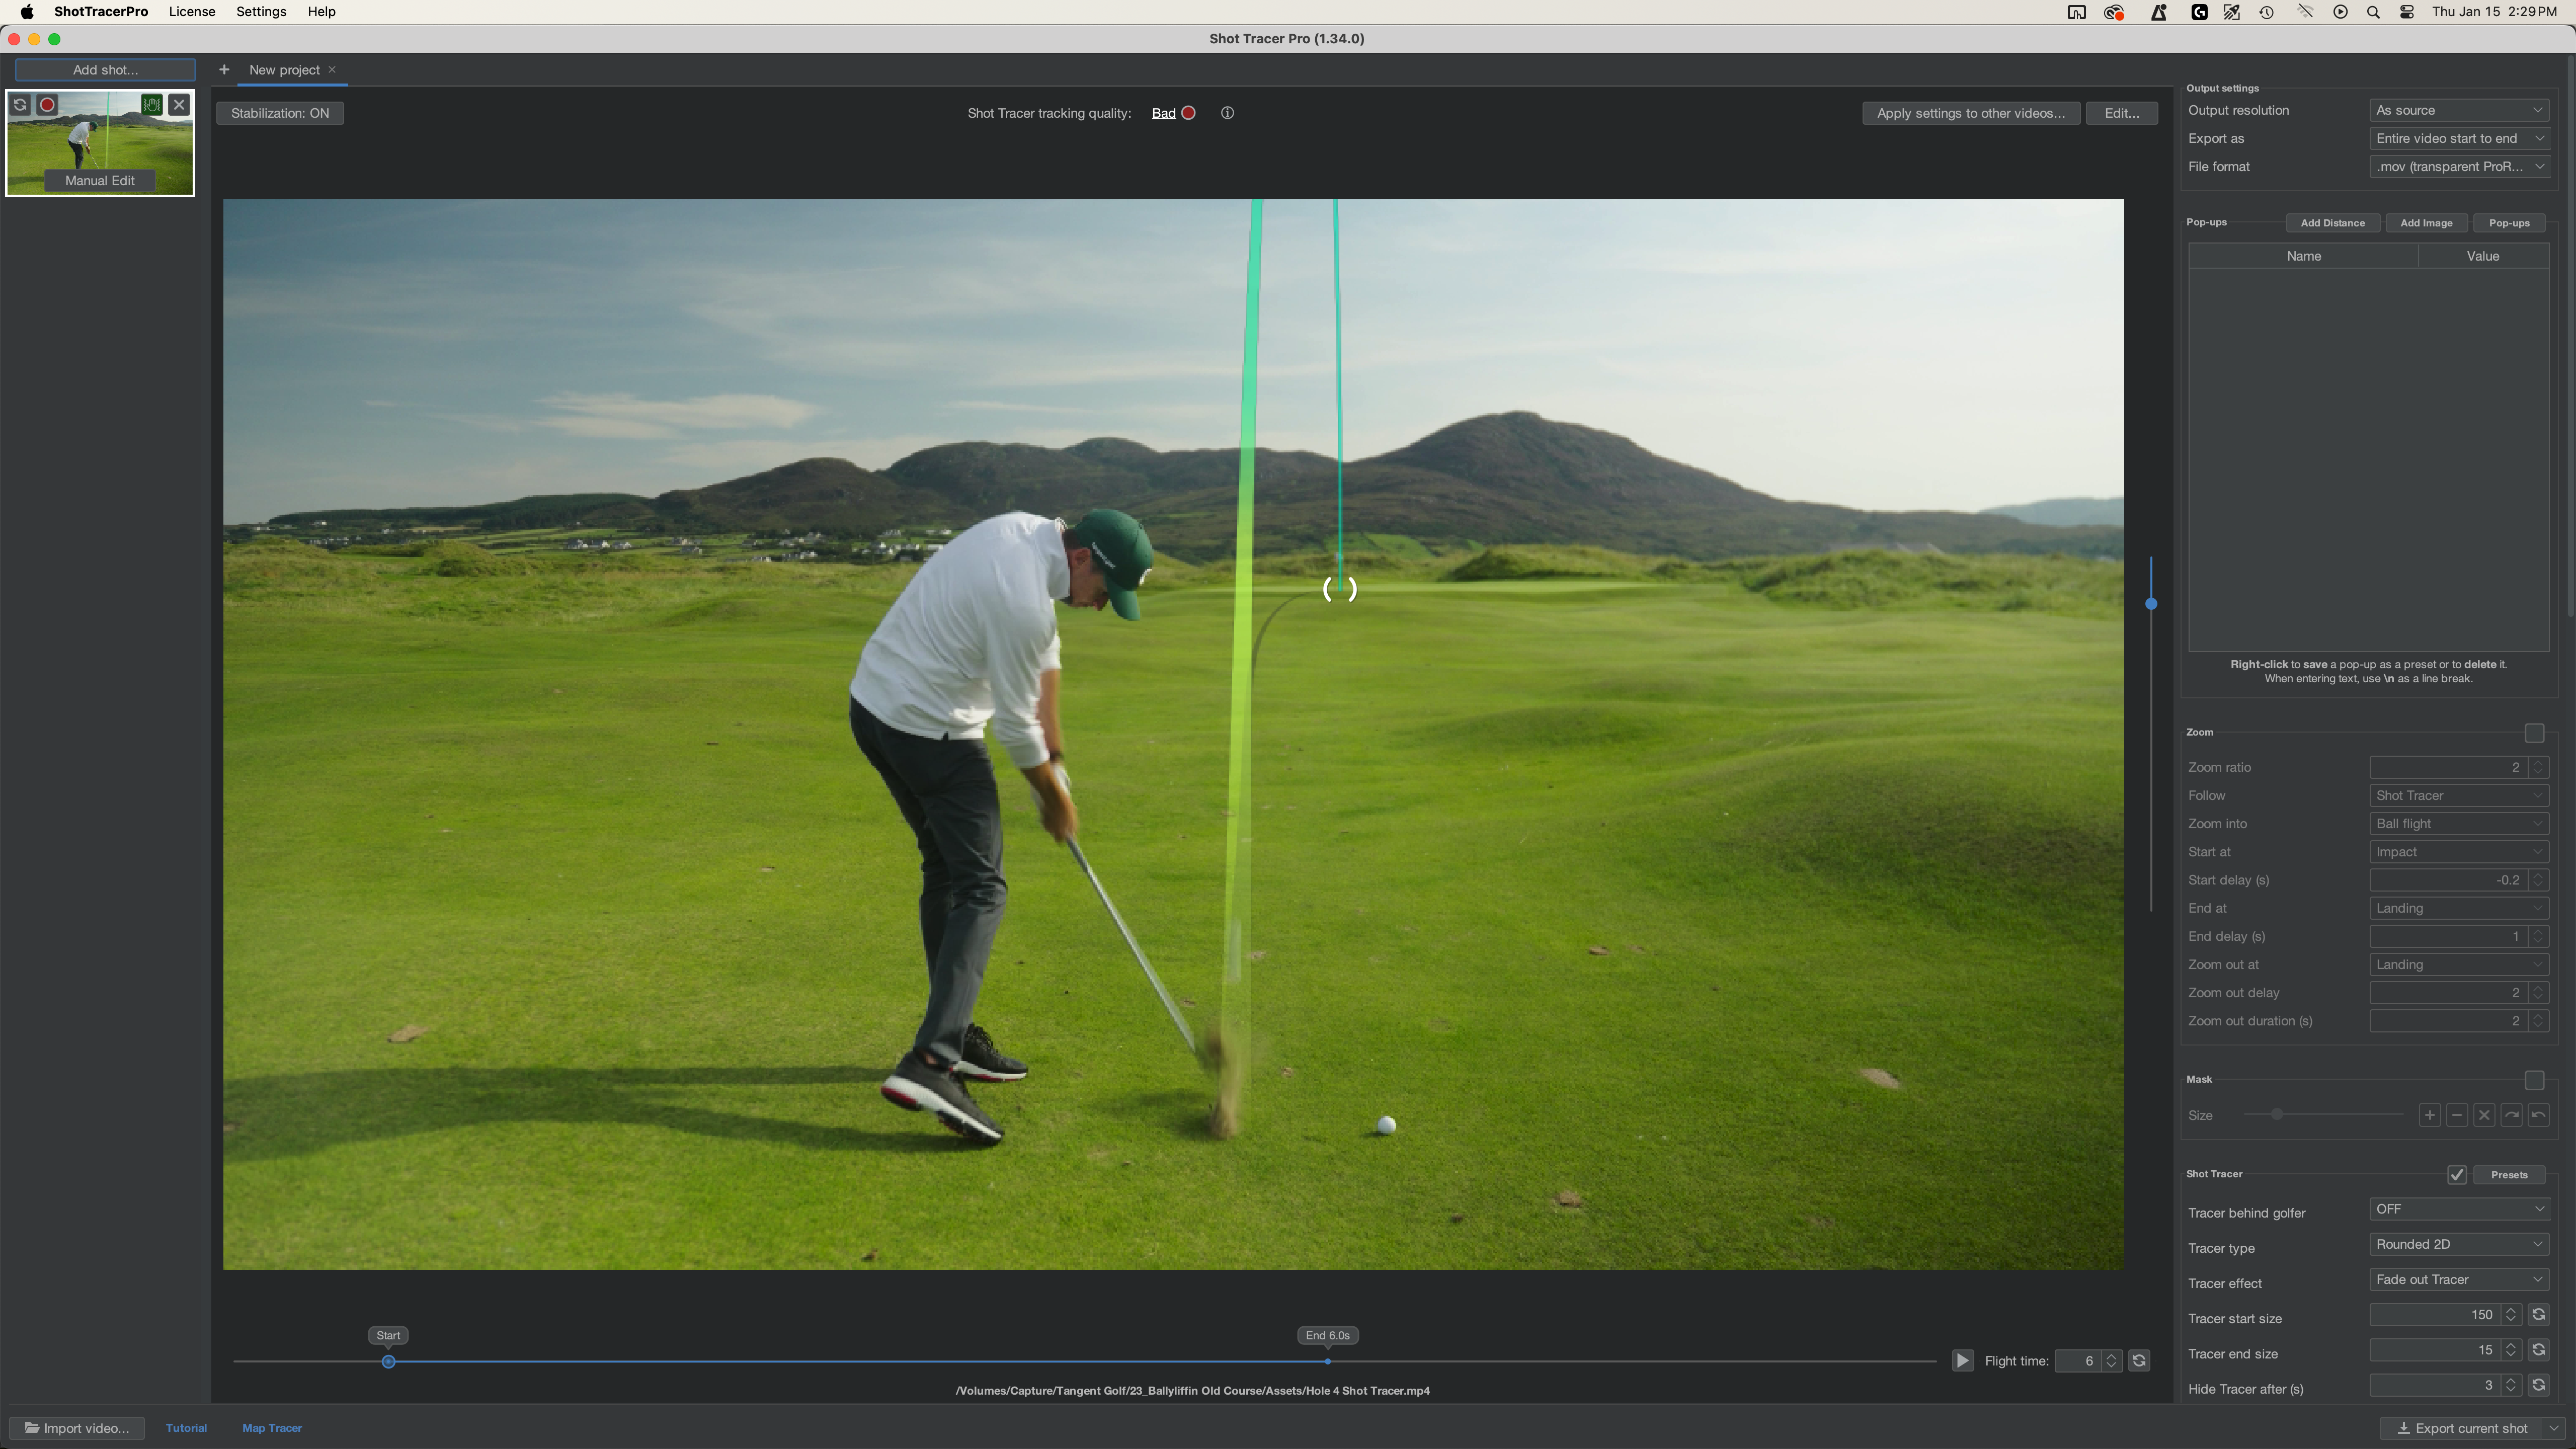
Step 4 - Shot Tracers
Shot tracers are extremely important for golf videos. Without them, it is often hard to see where the ball is going, so in our opinion they are a must. Shot tracers also take time. There is no way around that. In a full 18-hole round, you will usually need to create 30 to 40 shot tracers.
The best solution we have found is ShotTracer Pro. It is not a perfect program and it does have bugs, but there is currently nothing better available. There are other options, such as creating shot tracers in After Effects, but those methods take even longer. Our recommendation is to use ShotTracer Pro. It is relatively affordable at about $90 per year.
There are some great tutorials available for ShotTracer Pro. We recommend watching at least one before getting started.
Here are our tips for making shot tracers faster and easier:
- Nest shots in your edit and batch export them for shot tracer work.
- Film shots using a static tripod. Camera movement adds complexity and increases time due to tracking.
- Shoot with a closed-down aperture, such as f/5.6 or higher. Avoid shallow depth of field, as it makes it harder for the software to detect the ball.
- If you cannot clearly see where the ball lands, reference the next shot and make your best guess. Tracers do not need to be perfect.
- Frame-by-frame tracking is more accurate. Line modeling is faster and works best for vertical iPhone footage.
- Work in small batches and export frequently, as the program can crash.
We recommend exporting your shot tracers as transparent .mov files. Once exported, you can drop them into each nested clip. This gives you flexibility to color grade the footage underneath without affecting the tracer line.
Step 5 - Graphics
Now that your shot tracers are complete, it is time to create the score graphics. The best way to approach this is by creating a reusable template. Whether you build it directly in Premiere, After Effects, or using static images, having a template will make this process much faster for every video you produce.
Our recommendation is to create a .MOGRT file that can be easily imported and updated in Adobe Premiere. You can do this in After Effects by designing your graphic and setting the changeable elements in the Essential Graphics panel. This allows you to update scores, hole information, and other details directly in Premiere without having to re-edit the original After Effects file.
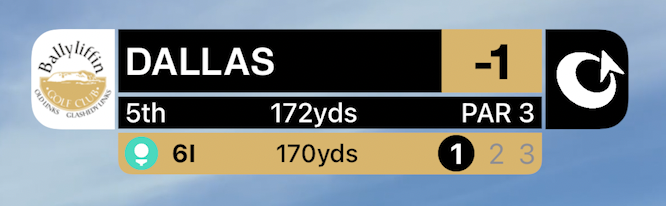
Typically, you’ll want your template to include:
- Hole Par (3, 4, or 5)
- Hole #
- Yardage Left
- Current Score
- Shot Tracker (1, 2, 3, for par, for bogey, etc.)
When designing your .MOGRT, consider these tips:
- Keep it clean and easy to read on both desktop and mobile.
- Use contrasting colors for text and background so it’s visible over the video.
- Make the elements modular, so you can show or hide things like shot tracker or yardage depending on the shot.
- Test it on a sample video first to ensure timing, sizing, and legibility work across the full round.
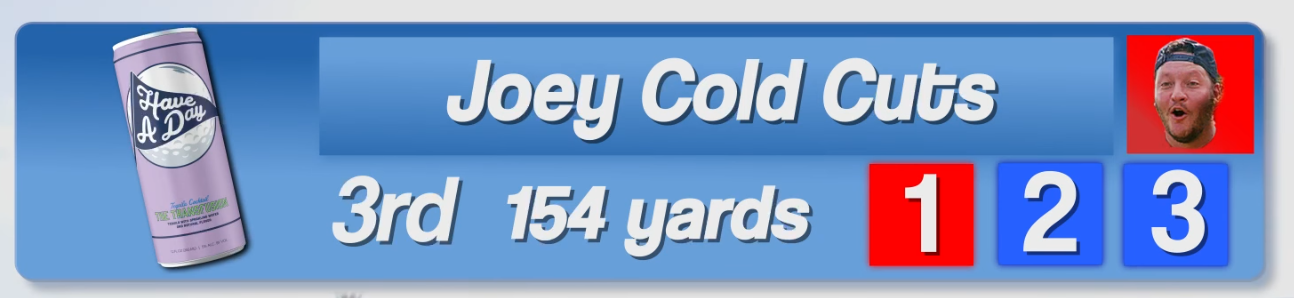
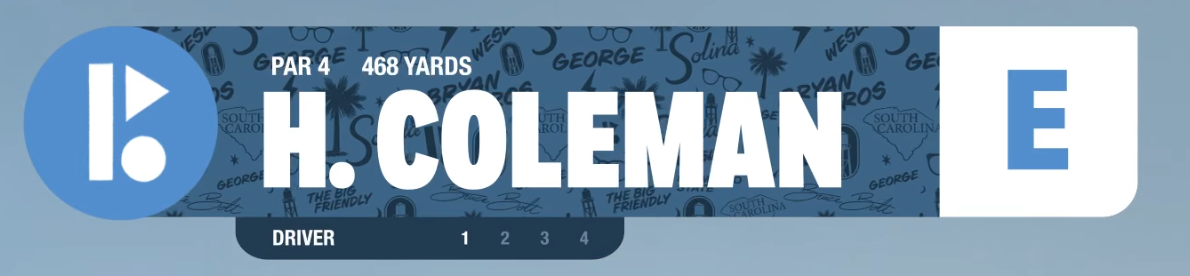
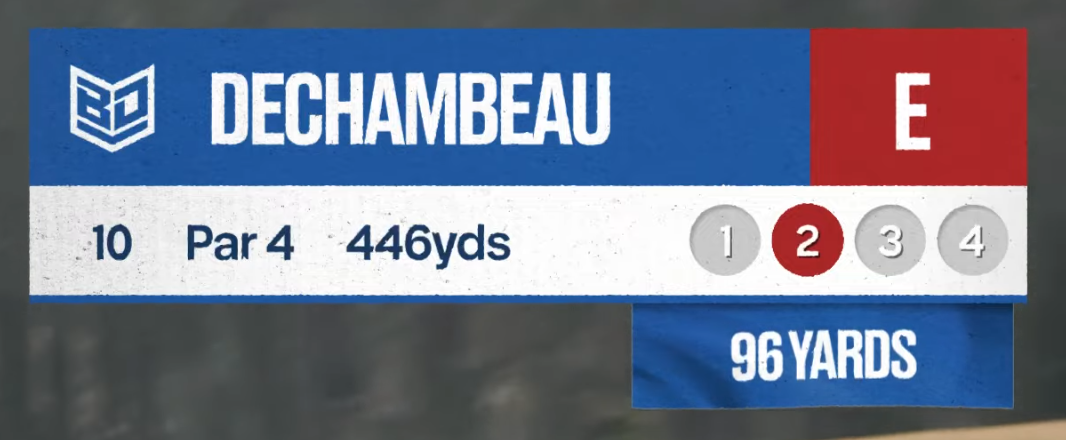
The design is up to you, but it can help to look at the graphics used by popular YouTube golfers for inspiration. We'll paste a few in before. Once your .MOGRT is set up, adding scores and shot info becomes a fast and consistent process for every golf video you edit.
Another way to create score graphics is by using the built-in scorebugs from Tangent Golf. Tangent Golf is a golf GPS app and one of our clients. If you track your shots in the app, you can export each shot as a separate PNG that contains all the information you need, including hole, par, yardage, score, and shot number.
Once exported, simply import the PNGs into your Premiere sequence. This method is super easy, customizable, and works well for creators who want accurate, on-screen shot data without building graphics from scratch.
You can use this approach alongside or instead of a .MOGRT template, depending on your workflow and how much customization you want for your videos. If you need help, please reach out to us!
Step 6 – Final Cut (All Holes)
Now that the shot tracers are done and your graphics are in place, go back and do a final pass of the edit. While watching through, look for any strong moments that could be used later as an introduction or hook. Highlight these in a color for easy access.

For this final pass, your main focus is trimming any parts of the video that are slow or uninteresting. Especially if you are a new creator, you want viewers to stick around. If you are ever unsure whether to keep something, cut it. Less is often more when it comes to engagement.
Step 7 – Intro/Hook
Save the introduction and hook for last. This is arguably one of the most important parts of your video, especially if you do not yet have an audience. With so much golf content available, you need to give viewers a reason to keep watching.
The intro should be short, attention-grabbing, and give viewers a reason to stick around. It should also tie in with your thumbnail and title.
Popular formats for intros/hooks include:
- Tease key moments or highlight the best shots in the video
- Set up a challenge or create stakes for the round
- Epic introduction with music and sound effects
- Something unique that no one else has done
Intros and hooks can be difficult to master, but it takes time and experimentation to find a style that works for you. Some attempts will fail, and that is normal. Keep trying until you find a formula that fits your content and audience.
Step 8 – Export
Nothing complicated here—export your masterpiece!
We recommend the following settings:
- 4K videos: Bit rate of 50 MB or higher
- 1080p videos: Bit rate of 25 MB or higher
Step 9 – Short-Form Repurposing
Don’t forget about short-form repurposing! Turning your long-form golf videos into short-form clips doesn’t require much extra work and is an easy way to get more eyes on your content. Here’s our fast and simple process:
- Duplicate your long-form timeline and watch it through, highlighting potential clips in a different color.
- Delete everything you didn’t highlight.
- Change your timeline sequence to vertical format:
- For 4K footage, set it to 1215x2160 to save time on scaling
- Otherwise, use 1080x1920
- Make all edits in this sequence (besides captions), leaving a gap between each short clip.
- Nest each short clip, which creates a separate timeline in your project.
- Open each nested timeline and add captions.
For captions, we recommend Brevidy for fast and accurate automated captions. You can also use Premiere’s built-in caption tools. Here is a tutorial we made a while back to show the workflow.
Do You Need Help Editing Golf Videos?
If you are a golf brand or a large golf content creator, we can take the editing off your plate. Our Edit-Only plans are perfect for both long-form golf videos and repurposed short-form content.
Reach out to schedule a call and see how we can help. In the meantime, check out some of our golf work on our portfolio page to see examples of what we’ve created.

